In this blog post I will show you how to install and configure SonarQube in order to manage the code quality of your Python project.
Installing SonarQube
- Go to the SonarQube official website and download the latest version. At the time of writing this blog post the latest version is 6.0.
- The downloaded file is in a ZIP format so you have to unzip it in a folder of your choice. I am using Ubuntu so I extracted the zip in /opt/sonarqube.
- Now open a terminal/command prompt and go to $SONAR_INSTALL_PATH/bin/$OS where $OS is your operating system. For me it is linux-x86-64.
- Depending on you operating system you can start the SonarQube server as follows:
- For Windows - type StartSonar.bat and hit Enter.
- For Linux/MacOS - type ./sonar.sh console and hit Enter.
If you have some issues related access denied then run the command as sudo.
If you have some issues related to JVM such as "wrapper | Unable to start JVM: No such file or directory" or similar then go to $SONAR_INSTALL_PATH/conf and open the wrapper.conf file. Edit the wrapper.java.command property and set it to an appropriate Java path. In my case it is /opt/java/jdk1.8.0_101/bin/java.
- Open a browser and go to http://localhost:9000/. If you see something then everything is ok. Otherwise you should take an eye on the console output and investigate the issue.
Installing the Python plug-in
- Open a browser and go to http://localhost:9000/
- Log in with admin/admin.
- Go to the Administration tab -> System -> Update Center (these may vary due to your SonarQube server version).
- Click on the Available button.
- Search for the Python plug-in and choose Install.
- Restart the SonarQube server if needed.
Installing SonarQube Scanner
- Go to the SonarQube Scanner page and download the latest version. At the time of writing this blog post the latest version is 2.7.
- And again the downloaded file is in a ZIP format and you have to unzip it in a
folder of your choice. In my case it is in /opt/sonar-scanner.
- Optional but a good idea is to add the $SONAR_SCANNER_PATH/bin to your path variable because the sonar-scanner command will be used later.
- Now is the time to configure some settings of the scanner. Open the $SONAR_SCANNER_PATH/conf/sonar-scanner.properties file. You can set some properties for your project. The most common and their defaults are:
- sonar.host.url=http://localhost:9000 - the URL of the SonarQube server
- sonar.jdbc.username=sonar - username for the database (if you want an external database)
- sonar.jdbc.password=sonar - password for the database
- sonar.jdbc.url - the URL string to the database (Oracle, MySQL, Postgre and so on)
Configuring the project to be scanned
- Go to the Python project you want to scan and create a file named "sonar-project.properties".
- Now edit the file and set some properties:
- sonar.projectKey=my:project - the project id
- sonar.projectName=My project - the project name
- sonar.projectVersion=1.0 - the project version
These 3 properties are required
- sonar.sources=src1,src2 - the directories with sources you want to scan (comma-separated)
- sonar.language=py - the programming language (Java, Python, etc.)
- sonar.python.pylint=/usr/local/bin/pylint - the path to the pylin, if you want to include some quality rules from it
Running the scan
- Make sure the SonarQube server is up and running.
- Open a terminal/command prompt and navigate to the project folder where the "sonar-project.properties" file is located.
- Type sonar-scanner and hit Enter (if you added the sonar-scanner path to you path variable, otherwise use the absolute path to the command).
- When the execution is done go to the SonarQube server URL, e.g. http://localhost:9000.
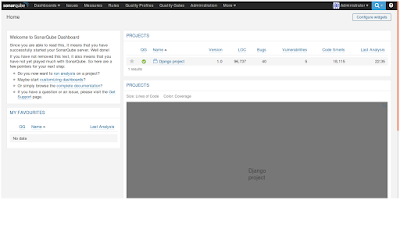
- You should see something like this:

- You can log with admin/admin credentials and make some investigation of the features.
Conclusion
That was just a brief explanation of how to run a Sonar scan over your Python project and the aim was not a review of the Sonar functionalities.
