In this blog post I will show you how to install and configure SonarQube in order to manage the code quality of your Python project.
Installing SonarQube
- Go to the SonarQube official website and download the latest version. At the time of writing this blog post the latest version is 6.0.
- The downloaded file is in a ZIP format so you have to unzip it in a folder of your choice. I am using Ubuntu so I extracted the zip in /opt/sonarqube.
- Now open a terminal/command prompt and go to $SONAR_INSTALL_PATH/bin/$OS where $OS is your operating system. For me it is linux-x86-64.
- Depending on you operating system you can start the SonarQube server as follows:
- For Windows - type StartSonar.bat and hit Enter.
- For Linux/MacOS - type ./sonar.sh console and hit Enter.
If you have some issues related access denied then run the command as sudo.
If you have some issues related to JVM such as "wrapper | Unable to start JVM: No such file or directory" or similar then go to $SONAR_INSTALL_PATH/conf and open the wrapper.conf file. Edit the wrapper.java.command property and set it to an appropriate Java path. In my case it is /opt/java/jdk1.8.0_101/bin/java.
- Open a browser and go to http://localhost:9000/. If you see something then everything is ok. Otherwise you should take an eye on the console output and investigate the issue.
Installing the Python plug-in
- Open a browser and go to http://localhost:9000/
- Log in with admin/admin.
- Go to the Administration tab -> System -> Update Center (these may vary due to your SonarQube server version).
- Click on the Available button.
- Search for the Python plug-in and choose Install.
- Restart the SonarQube server if needed.
Installing SonarQube Scanner
- Go to the SonarQube Scanner page and download the latest version. At the time of writing this blog post the latest version is 2.7.
- And again the downloaded file is in a ZIP format and you have to unzip it in a
folder of your choice. In my case it is in /opt/sonar-scanner.
- Optional but a good idea is to add the $SONAR_SCANNER_PATH/bin to your path variable because the sonar-scanner command will be used later.
- Now is the time to configure some settings of the scanner. Open the $SONAR_SCANNER_PATH/conf/sonar-scanner.properties file. You can set some properties for your project. The most common and their defaults are:
- sonar.host.url=http://localhost:9000 - the URL of the SonarQube server
- sonar.jdbc.username=sonar - username for the database (if you want an external database)
- sonar.jdbc.password=sonar - password for the database
- sonar.jdbc.url - the URL string to the database (Oracle, MySQL, Postgre and so on)
Configuring the project to be scanned
- Go to the Python project you want to scan and create a file named "sonar-project.properties".
- Now edit the file and set some properties:
- sonar.projectKey=my:project - the project id
- sonar.projectName=My project - the project name
- sonar.projectVersion=1.0 - the project version
These 3 properties are required
- sonar.sources=src1,src2 - the directories with sources you want to scan (comma-separated)
- sonar.language=py - the programming language (Java, Python, etc.)
- sonar.python.pylint=/usr/local/bin/pylint - the path to the pylin, if you want to include some quality rules from it
Running the scan
- Make sure the SonarQube server is up and running.
- Open a terminal/command prompt and navigate to the project folder where the "sonar-project.properties" file is located.
- Type sonar-scanner and hit Enter (if you added the sonar-scanner path to you path variable, otherwise use the absolute path to the command).
- When the execution is done go to the SonarQube server URL, e.g. http://localhost:9000.
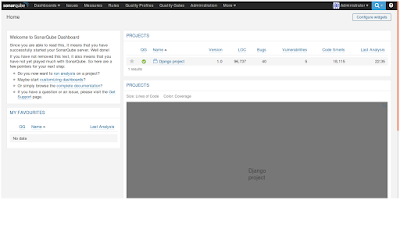
- You should see something like this:
- You can log with admin/admin credentials and make some investigation of the features.
Conclusion
That was just a brief explanation of how to run a Sonar scan over your Python project and the aim was not a review of the Sonar functionalities.

hi...
ReplyDeleteim getting error while creating sonar-project.properties file in my project directory . sonar-scanner command is not able to find the .properties file.
Hello,
Delete1) Are you trying to run .sonar-scanner from the project directory?
2) If so, did you add the {SONAR_SCANNER_PATH}/bin to your path variable?
Regards,
Ivan
ReplyDeleteGreat Article. its is very very helpful for all of us and I never get bored while reading your article because, they are becomes a more and more interesting from the starting lines until the end.
python online training
I'm glad to hear that :)
DeleteThanks for sharing
ReplyDeletePylint report is not uploaded in sonarqube even when all the rules of pylint are imported and activated in sonarqube server
ReplyDeleteI'm new for python. How can I find the sonar.projectKey in my Python project folders?
ReplyDeleteHi,
Deletesonar.projectKey can be whatever you want. Just make sure there is no other projects with this key.
Can anyone share the working python application repository.
ReplyDeleteThanks in advance
Which application? If you have an existing Python application, just use it. This article supposes that you already have a Python project.
DeleteUnfortunately I don't have any Python projects and I'm new to Python. So, if you can provide me any existing project. That would be great.
DeleteYou can find some beginner projects here:
Deletehttps://github.com/MunGell/awesome-for-beginners#python